Construction Process
Step 1 – Preparing subbase and foundation
The main contractor need to prepare a good load-bearing foundation in accordance with given specification from architects and engineers. Foundation and grids have to be well prepared before pouring concrete.
Step 2 - Pour concrete
Concrete with compressive strength of 25 Mpa, 4 inch thick and A6 or A7 load-bearing steel gratings is usually used in light vehicle area. Usually, thickness of concrete will be various from 85mm to 110mm. Concrete shall be compacted until all coarse aggregates are under the surface while allowing the cement and water mixture to come to the surface. Starting at the uphill point, use a screeding tool to flatten out wet concrete and preparing for coating color.
Step 3 – Coating color layer
The color layer need to be coated using 2 times sprinkle technique. In the first time, 2/3 of dry color pigment will be used and will be flatten with wooden, magnesium or aluminum tools.
The 1/3 mixture left will be spread evenly on surface using a trowel. Color pigment will be sprinkled by hand for a consistence coverage. The suggested amount of color pigment used is from 3.5 to 4 kg/m2.
Color pigment should not be apply while there’s still water on the surface otherwise the finishing surface will not have the best result. Using corrector tools to perfect edges.
Step 4 - Non stick coating
Floor will be ready for creating pattern when you push down on the surface and feel it bounce back. A thin layer of non stick powder will be evenly spinkled on both concrete surface and moulds. The amount of non stick powder used will be from 0.15 kg/m2 to 0.2 kg/m2.
Step 5 – Stamping patterns.
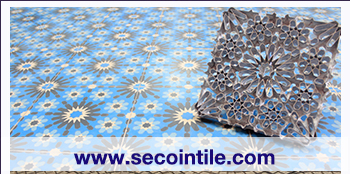
The process of stamping patterns will be done right before the surface is harden completely. However, if this process is done too soon then the mould can come down too deep or surface is scratched. Each mould will be put on top of concrete surface and a few mould will be lined together to create a complete design (there’ll be at least 5 moulds). Put a flat large object on top of those moulds helps creating pressure to stamp patterns on concrete surface. Continually move those moulds to other area and repeat until all of the floor is stamped.
It is important that workers are familiar and understand pattern on each mould in order to follow correctly the design idea. Therefore, new workers might need to practice stamping on sand surface before working on concrete floor.
Another important step is to choose a right spot before stamping. The first stamping area need to be specified carefully beforehand or else the whole stamping process might have problem.
Step 6 – Rinse and seal protection layer.
Only after 7 days of curing should the cleaning starts. Sweep away all the non stick powder left before washing the surface with low pressure water spray. Use regular soap the clean and then rinse with water. Avoid using chemical with high amount of acid to clean surface. Also, avoid cleaning too much at hollow area because it might affect the result of creating an antique surface.
Leave the clean surface to be completely dry under the normal condition for 2 to 4 hours before sealing protection coat. Normally, you should coat the surface with 2 layers of acrylic solvent. However, in some cases, people only uses 1 layer to save time and labour costs.
Maintenance
Sealer need to be apply again, after 6 to 24 months, depending on type of sealer, location (ie: outdoor or indoor), traffic (ie: heavy or light), and user habit (ie: the floor is frequently cleaned and protected). Under good maintenance condition, a stamped concrete floor can last for 20 years.


