Installation guide for encaustic cement tiles
(The installation guide provided below is only for the reference purpose.
It is highly recommended that you should hire a professional contractor for laying tiles)
SOME RECOMMENDATIONS
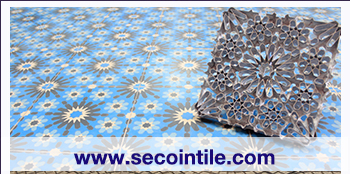
1. COLORS & SIZES - Secoin encaustic cement tile are produced from natural materials. The production process is hand-made. Therefore, the tiles can have colors, patterns and sizes variations in a certain level. These characteristics have brought natural beauty for encaustic cement tiles. When installing the tiles, you should install randomly from different tile boxes to get the natural beauty of the color.
2. EFFLORESENCE - Secoin Encaustic Cement Tile have very few problems with efflorescence as we are using a special additive which has the function of reducing efflorescence. However efflorescence is an inherit problem for all cement-based products. It is a natural occurring phenomenon which is harmless and cannot be totally controlled. If you see white marks on tile surface - that is efflorescence which will gradually go away.
3. STORAGE BEFORE INSTALLATION – Make sure all tiles are protected whilst waiting for installation. Leave all Secoin Encaustic Cement Tile packed until they are ready to be laid. Do not stack or place Secoin Encaustic Cement Tile in a manner in which they are not intended (such as exposure to sun, rain, humidity,…), this may lead to marking.
4. TILE SURFACE PROTECTION – Secoin encaustic cement tiles are coated with a sealer in our factory. This coating is to protect the tile surface during transport and storage. However, this coating is NOT strong enough to protect the tile surface from the entry of stain. Therefore, the tiles should be carefully protected during construction to keep the surface without stain. When installing, please keep your hands clean. Do not write symbol on the tiles even with a pencil because it can leave marks which may be difficult to remove on the surface.
5. CHECK BEFORE INSTALLATION - We recommend that you check carefully before installing the tiles. We will not be responsible when the tiles have been cut or installed.
6. CAUTION WHEN USING SEALERS - Always follow the instructions from the sealer suppliers. We suggest that you should use penetrating sealers with high quality and reputation in the market to protect the tile surface. You can coat many layers to protect the tiling floor to be the best. Please try to coat on one tile before coating the entire floor to ensure utilization of appropriate sealers following the requirements.
EQUIPMENT AND TOOLS
These are basic equipment and tools. You may need more tools for doing the installation.
A. EQUIPMENT
- MIXER: Bottom layer material mixer (mixer or hand drill)
- EQUIPMENT FOR DIVIDING GAP AND CHECKING FLATNESS: With the largest floor area should take the base surface with high flatness and uniformity
- TILE CUTTER: Cutting tile without damages of the edge
B. TOOLS
- Level
- Hand trowel
- Grout float rubber
- Rubber hammer
- Carpenter's square
- Containers to wet the tiles
- Buckets for mortar
- Sponge
- Sand paper
- Clean rags
- 3~5 m aluminum straight edge
- Tape measure
- Pencil
INSTALLATION PROCESS
Installing encaustic tiles is a simple process but requires GREAT CARE so as not to damage the surface of tiles and floor tiles to get the best.
Step 1: Preparing the substrate and tiles for flooring
§ Prepare the tiling substrate which is flat and clean
§ Soak tiles in water for about 20 seconds
§ The tiles can be installed on the substrate with mortar or glue. For the best adhesion, apply mortar or adhesive to both the substrate and the back of the tiles.
Step 2: Installing the tiles on the substrate
§ Install the first tiles in three different corners of the floor. Stretch cords to determine the tiled surface.
§ The tiles are installed by hand and should be done carefully so as not to damage the tiles. Install one row of the tile based on the selected design to review if there is any adjustment before fixed installation.
§ For tiles 200x200mm, the gap between the tiles up to 2-3 mm. For other sizes of tiles, the gap can be bigger or smaller or depending on the specification from designer.
§ After placing the tile on the substrate, use hands or a rubber hammer to balance the tile surface. Do not use a normal hammer or similar tools to balance the surface. Check among the tiles that have equal surface height as if mortar or glue has dried, it cannot be adjusted anymore.
§ If there is any dirt or mortar or adhesive on the tile surface, please clean the surface immediately. If dropping mortar on the tile is not cleaned immediately, it will cause stain on the tile surface and after that, the cleansing is very difficult.
Step 3: Cleaning the floor surface and applying penetrating sealer at the first time
§ Let the tiles to get firmly fixed on the floor after the mortar dries, then check the tile surface and clean it. If it still has dried mortar on the tile surface, use a knife blade lightly and carefully to not scratch the tile surface. You can also use sand paper grit #320 or #400 to scrub with water. Absolutely NOT use acid or bleach to clean the floor. Wait for the surface is completely dry before proceeding to coat with protective penetrating sealer in the first time.
§ Coat a penetrating sealer on the tile before applying grout. The purpose of the first coating is to provide a 1st protective layer to prevent grout stick on the tiles. Wait for the coating to be completely dry (approximately 12-24 hours).
Step 4: Grouting the tiles
§ Applying grout on very thin joint among the tiles. Grout can be white or light colors. Most common grout is white powder. If using color grout, choose the color similar to the tile color. DO NOT use black or dark-color grout because they can cause stain on the tile surface and unable to be removed. Clean the excess grout on the tile surface.
§ After installing and applying grout for the tiles, they must be cleaned immediately with water. Do NOT use any cleaning liquids containing acids. For necessary hygiene, you can use a neutral soap.
Step 5: Applying penetrating sealer the second time
§ Leave the tiled floor to be completely dry, then apply protective penetrating sealer for the 2nd time.
Step 6: Protecting the floor after installation and during using process
§ For new construction projects, please cover to protect the surface so that the interior contractors do not damage the floor in the process of finishing the construction.
§ In using process, the floor should be covered with protective penetrating sealer periodically, usually every 6-12 months depending on the type of sealer used and the traffic on the floor.
Thank you for choosing Secoin encaustic cement tiles. Hope you will have a beautiful and satisfactory tile floor.


